Reach Platform HRIS Integration Set Up Guide
Setting up the HRIS integrations with Paradigm Reach is a multi step process.
Step 1: Invite HRIS Admins
- Granting users HRIS admin permissions will enable them to help setup and maintain your HRIS integrations with Reach. To set up the integration, you’ll need to have an HRIS admin who has full admin permissions in your organization’s HRIS account.
- Reach HRIS admins are able to view and edit the following admin areas in Reach:
- Admin Dashboard
- Account pages
- Team pages
- Support pages
- HRIS admins are not able to view the following admin areas in Reach:
- Assignments
- Analytics
- Email Templates
- You will be able to add additional HRIS admins (or remove current ones) later by going to that team member's profile.

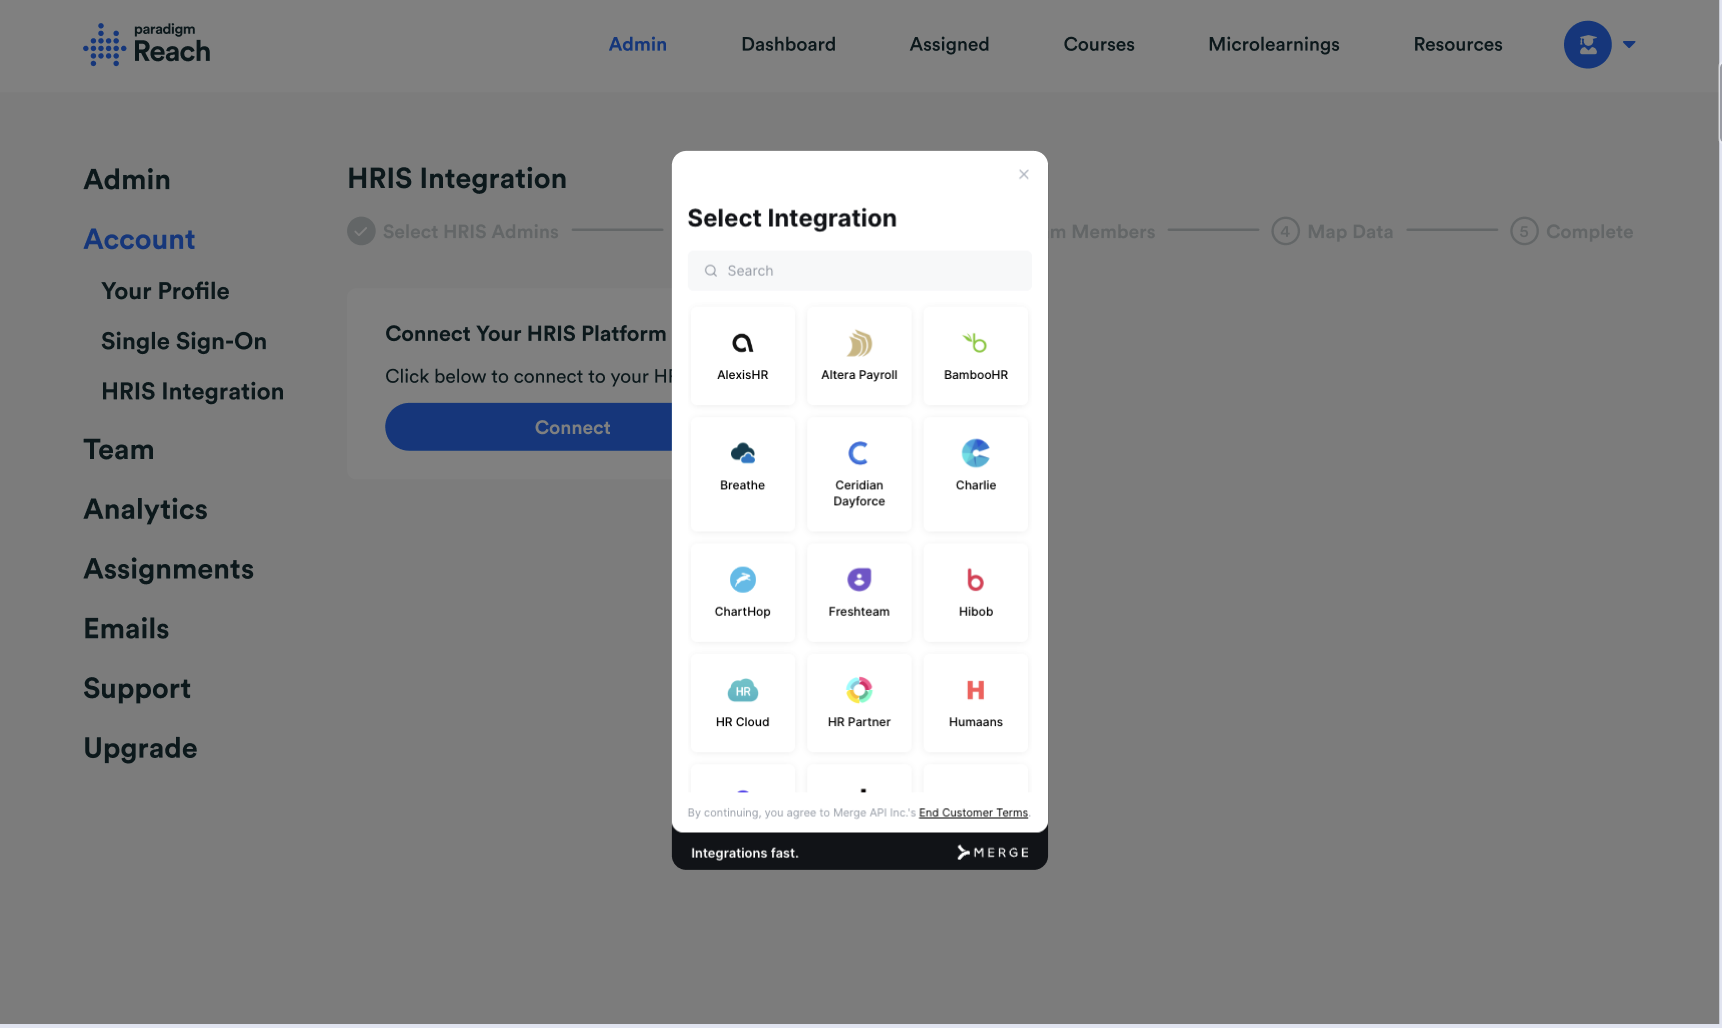
Step 2: Connect your HRIS platform
- In this step, you’ll use Merge Link to connect your organization’s HRIS account to Merge. To find more specific details for how you’ll authenticate your HRIS account with Merge, find your HRIS platform from this list of docs.
- On the Merge Link widget, you will also see the option to select which field in your HRIS you'd like to utilize for the Job Level field within Reach. By default, we'll use the Job Title field, but if you have a Job Level field, we recommend selecting that field in this step.
- Once you’ve successfully linked your HRIS account with Merge, a sync will take place. This could last a couple of hours, so we’ll let you know when it is complete and you can proceed to the next step.


Step 3: Select Team Members
- If not everyone in your HRIS account should be in Reach, you’ll have the option to only select employees with specific employment types to sync between your HRIS and Reach. We will display the employment types as they exist in your HRIS to make it easier for you to decide which users should be pulled into Reach from your HRIS.
- Ex: You only want full-time employees to receive training in Reach and not contractors. You'll want to ensure the full-time employment type is selected, but contractors are not.
- Note: If you have custom employee types available simply click the "enable" checkbox and a different set of employee types will appear below for you to filter on.
- You’ll also be prompted to choose if new employees should be added to Reach and invited, so they can access Reach on their first day, or if you’d like us to just add them to Reach for now and you’ll manually invite them later. We highly recommend selecting the option to add and invite new team members, which simplifies administration. Please note that users must be invited to Reach to be enrolled in Assignments, so if you don't elect to automatically invite them on their first day, make sure you remember to invite them before they are supposed to be enrolled to their first Assignment!
- 💡You will not be able to easily change these settings later, so please ensure you are selecting the correct employment types during this setup process and if you want to add only or add and invite users.

Step 4: Map Data Fields
- Some of the fields in Reach don’t have direct matches in most HRIS systems, so we’ll need you to map some fields in your HRIS to Reach’s Location, Department, and Job Level fields.
- For each field, you'll see a dropdown with options from your HRIS. Once you select an option from the dropdown, you'll see a preview of the variables for that field in the table below. You can customize how the variables appear in Reach or you can use the defaults. Once you save the variables for each field, you'll have the option to automatically use default variables for future syncs or choose to customize the variables for any new variables introduced in the future.
- Ex: A few months after the initial setup of the integration, you have a new hire from Portland, OR and they're the first employee from this location.
- If you select to use the default mappings for the Location field, we will automatically add "Portland, OR, US" as a location variable and add this user during the sync. (We recommend this setting!)
- If you select to customize future mappings for the Location field, we will send you an email letting you know a new Location variable has been identified that we need you to map. You'll then need to login to Reach, customize and confirm how the new variable should appear in Reach, and then we'll sync that user. That new user will not be added until the new variable is confirmed.
- Ex: A few months after the initial setup of the integration, you have a new hire from Portland, OR and they're the first employee from this location.
- Most of our customers will use the default mappings, but we understand that sometimes you may want to customize them by combining certain variables together for Reach. For example, rather than having the departments Business Operations, Revenue Operations, Finance Operations, and Product Operations, you may want to customize all of those variables to be simply Operations in Reach.
- 💡 Please note that you will not be able to easily remap fields later, so we recommend confirming everything before you save.
- For each field, you'll see a dropdown with options from your HRIS. Once you select an option from the dropdown, you'll see a preview of the variables for that field in the table below. You can customize how the variables appear in Reach or you can use the defaults. Once you save the variables for each field, you'll have the option to automatically use default variables for future syncs or choose to customize the variables for any new variables introduced in the future.
Step 5: Complete
- Once all the mappings have been completed, we’ll run another sync and your integration will be fully configured. This last sync may take a few hours to finish.
- HRIS admins will receive emails after each sync takes place with a summary, including any errors that need to be resolved.
- If you had dynamic groups in place prior to connecting to your HRIS, you'll want to recreate those groups to ensure we're using the correct information for future Assignments!